Extension Methods for Easy Data Extraction

Today I am continuing the theme of extension methods by talking about a few I primarily use for aiding in testing scenarios. Have you ever been in the situation where you are stepping through your code and get a set of data back from a SQL call and wish there was an easy way to save it so you could use it as test data? I have a few extension methods that make this situation much easier and all deal with a DataTable.

DataTable Extension Methods

public static void ToCSVFile(this DataTable dt, string fileName, char splitCharacter)
{
    File.WriteAllText(fileName, dt.ToCSVString(splitCharacter));
}
 
public static string ToCSVString(this DataTable dt, char splitCharacter)
{
    StringBuilder sb = new StringBuilder();
    string[] columnNames = dt.Columns.Cast<DataColumn>().
                                        Select(column => column.ColumnName).
                                        ToArray();
    sb.AppendLine(string.Join(",", columnNames));
    foreach (DataRow row in dt.Rows)
    {
        string[] fields = row.ItemArray.Select(field => field.ToString()).ToArray();
        sb.AppendLine(string.Join(",", fields));
    }
    return sb.ToString();
}
 
public static void FromCSVFile(this DataTable dt, string fileName, char splitCharacter)
{
    StreamReader sr = new StreamReader(fileName);
    dt.FromCSVString(sr.ReadToEnd(), splitCharacter);
}
 
public static void FromCSVString(this DataTable dt, string csvData, char splitCharacter)
{
    StringReader sr = new StringReader(csvData);
    string[] columns;
    string[] rows;
    string myStringRow = sr.ReadLine();
    columns = myStringRow.Split(splitCharacter);
 
    foreach (string column in columns)
    {
        dt.Columns.Add(column);
    }
    myStringRow = sr.ReadLine();
    while (myStringRow != null)
    {
        rows = myStringRow.Split(splitCharacter);
        dt.Rows.Add(rows);
        myStringRow = sr.ReadLine();
    }
}

Here I have four extension methods that make saving and loading a DataTable extremely easy. You can save to and read from a file or string that contains data separated by the delimiter of your choosing.

Usage

There are two ways to use these methods to save data off quickly, of course these methods can also be used for normal coding as well and not limited to the below scenarios.

  • Drop in a line of code right after you get the data back into your DataTable.
myTable.ToCSVFile(@"C:\Source\CSVTest.csv"',');
        // OR
string s = myTable.ToCSVString(',');
  • While debugging use the Immediate Window and write the same line after a break point has been hit, within scope of the DataTable, after it has been filled.

Using the Immediate Window to quickly save off data from a DataTable while stopped at a break point via Extension Methods.

Using ToCSVString and ToCSVFile from the Immediate Window is extremely useful because it does not require you to edit your code and can be used as an after though while debugging, Just In Time data extraction ;).

How is this helpful?

Once you have the data as a string or file you can use it in lots of different scenarios.

  • While stepping through code the data can be used to overwrite what is in a DataTable to try out different scenarios that may be hard to replicate.
  • You can use the string value in a unit test as part of your test setup data.
  • When using a test harness or mock you can load this data into the return variable.
  • During the exploratory phase of development simply add a line of code to load the data into a DataTable to see if what you are writing even works.

Summary

Having these extension methods handy has proven to be extremely useful in debugging, testing, and general coding. They help make life easier and development faster by saving time trying to create data sets from live scenarios and figuring out how to reuse that test data. These same ideas could easily apply to other collection types such as Lists, Arrays, and many more objects. The ability to quickly serialize data for later use is a need every developer runs into over and over again, why not keep around a few fancy extension methods to make life a little easier?

I would love to hear about any alternative methods that you use to quickly extract and save data on the spot such as when debugging. Let me know in the comments or on twitter@ScottKerlagon!

Guard Clauses Via Extension Methods

Extension methods are pretty cool. They allow you to add functionality to a class or to a type’s behavior. Extension methods usually make life much easier and your code cleaner. I am going to share a few extension methods that make repetitive guard clauses, shorter and easier to read.

Guard Clauses

Guard clauses are those checks at the top of a method to validate all the parameters being passed in. Most of the time, they are used to check if an object is null, a string is empty, or that a collection at least contains something and is not empty. When the parameters do not pass the checks usually some sort of Argument Exception should be thrown. This helps to validate all the parameters before your method begins working on them and provides a better explanation than what could possibly be thrown. Without guard clauses we would have null reference exceptions all over the place which are a pain to debug.

Below I have a method that prints a heading and then a list of names. I want to validate the heading and all the names before I actually print them out. The traditional way is to have code that looks like the following:

public static void PrintNames(string heading, ICollection<string> names)
{
    if (string.IsNullOrEmpty(heading))
        throw new ArgumentNullException("heading");
    if (names == null || names.Count == 0)
        throw new ArgumentNullException("names");
    foreach (string name in names)
    {
        if (string.IsNullOrEmpty(name))
            throw new ArgumentNullException("names has a null or empty item.");
    }

This is pretty ugly to have all over the place and this type of checking is extremely repetitive across all your methods. So I have a class of extension methods that make this cleaner and easier.

public static class GuardExtensions
{
    public static T GuardClauseIsNull<T>(this T parameter, string name) where T : class
    {
        if (parameter == null)
            throw new ArgumentNullException(name);
 
        return parameter;
    }
 
    public static string GuardClauseIsNullOrEmpty(this string parameter, string name)
    {
        if (string.IsNullOrEmpty(parameter))
            throw new ArgumentNullException(name);
        return parameter;
    }
 
    public static ICollection<T> GuardClauseCollectionEmptyOrNull<T>(this ICollection<T> list, string name)
    {
        if (list == null || list.Count == 0)
            throw new ArgumentNullException(name);
 
        return list;
    }
 
    public static ICollection<T> GuardClauseCollectionEmptyOrNullAndAnItemIsNull<T>(this ICollection<T> list, string name) where T : class
    {
        if (list == null || list.Count == 0)
            throw new ArgumentNullException(name);
 
        foreach (T item in list)
        {
            item.GuardClauseIsNull(name + " has a null item.");
        }
 
        return list;
    }
 
    public static ICollection<string> GuardClauseCollectionEmptyOrNullAndAnItemIsNullOrEmpty(this ICollection<string> list, string name)
    {
        if (list == null || list.Count == 0)
            throw new ArgumentNullException(name);
 
        foreach (string item in list)
        {
            item.GuardClauseIsNullOrEmpty(name + " has a null or empty item.");
        }
 
        return list;
    }
}

The first method is a generic extension method and works on any object that derives from class, which almost all do. All these methods take in the name of the parameter, to be used in the exception message. The others are variations of this logic that also check if a collection is null or empty and optional methods to check each item. I have found these variations to be useful in different cases. This makes the calling code cleaner and less repetitive as you will see next.

Usage

I made a simple console application to show you how this works in different cases. I have different cases with different variations of null objects and lists to test with.

class Program
{
    static void Main(string[] args)
    {
        List<string> myNames = new List<string>() { "Scott""James""Bob" };
        List<string> myNamesWithNull = new List<string>() { "Scott"null"Bob" };
        List<string> myNamesWithEmpty = new List<string>() { "Scott""""Bob" };
        List<string> emptyList = new List<string>();
 
        PrintNames("The Names are:", myNames);              //Run 1
        PrintNames(null, myNames);                         //Run 2
        PrintNames("The Names are:", myNamesWithNull);      //Run 3
        PrintNames("The Names are:", myNamesWithEmpty);     //Run 4
        PrintNames("The Names are:", emptyList);            //Run 5
        PrintNames("The Names are:"null);                  //Run 6
        Console.ReadKey();
    }
 
    public static void PrintNames(string heading, ICollection<string> names)
    {
        try
        {
            heading.GuardClauseIsNullOrEmpty("heading");
            names.GuardClauseCollectionEmptyOrNull("names");
            names.GuardClauseCollectionEmptyOrNullAndAnItemIsNull("names");
            names.GuardClauseCollectionEmptyOrNullAndAnItemIsNullOrEmpty("names");
        }
        catch (Exception guardException)
        {
            Console.WriteLine(guardException.GetType().ToString() + Environment.NewLine + guardException.Message);
            return;
        }
 
        Console.WriteLine(heading);
 
        foreach (string name in names)
        {
            Console.WriteLine(name);
        }
    }
}

To save space after each run I comment out the previous runs. And the checking of the names collection would only use one of the extension methods instead of all three.

Output

Run 1

As you can see here the heading and names print out correctly.

Guard Clauses Run1

Run 2

Here the heading value is null which triggers an exception from our extension method.

Guard Clauses Run2

Run 3

In this run our extension methods catches that one of our names is null.

Guard Clauses Run3

Run 4

Here we catch that a name is an empty string. Not all cases would we care if it was empty but the extension methods give us that flexibility.

Guard Clauses Run4

Run 5

Here an empty list is caught.

Guard Clauses Run5

Run 6

And finally we see that a null list of names also throws an exception.

Guard Clauses Run6

Summary

Most of examples of extension methods are purely academic, such as counting words in a string or something that is generally just as useless. Here though these extensions for guard clauses can save us countless lines of repetitive code. Using the generic null check method covers the large majority of most guard clause usage. I am sure that you can come up with several other extension methods to cover specific types and use cases.

As always, let me know of ways to improve these guard clauses or your special use cases either in the comments or on twitter @ScottKerlagon!

Using Multithreaded Counters Safely

Have you ever had multiple threads running all trying to read and update a counter variable? Has that variable not always been what you expected? If yes you are probably not using any type of locking to guard that variable from being updated in one thread at the exact same time another thread is trying to update it as well. There are two main ways of updating a counter variable safely and ensuring that a value does not get missed or overwritten in C#. Those two ways are using the lock keyword or using the Interlocked class in .Net.

Keep in mind that incrementing  involves three actions:

  • Read, in which a variable is accessed from memory.
  • Increment, in which the value is increased.
  • Write, where the incremented value is written back to memory.

If multiple threads are trying to do this all at once there can be trouble. If thread A is in the increment step at the same time thread B is at the read step, then when A writes its value B will overwrite it with the exact same value. Two increments will only be seen as one in this scenario.

Lock

The first way is to have some code such as the following:

object myLock = new object();
int counter = 0;
        
public void ThreadMethod()
{
        lock(myLock)
    {
        counter++;
    }
}

Here we create an object, myLock, which is the object we are going to lock on, this is like the bathroom key at a gas station, only the current holder of the key can use the bathroom at that given time. The counter variable will hold the current count. We have a method, ThreadMethod, which is going to be run by multiple threads all at once, pretend some actual work gets done in there as well. Inside this method we “lock” on the myLock object which means only one thread is allowed inside the lock block at any given moment. As soon as one thread exists the lock block, another thread may enter. This insures that only a single thread is able to increment the counter variable at a time.

This method works fine but there are a few things to consider.

  • Using a lock is slow because only one thread can be inside the lock at once.
  • You have to remember to use the lock everywhere the variable is accessed.
  • If the lock object is reused for other variables they will all wait on the unrelated operations. Use a new lock object per variable.
  • Lock is great if you are doing more than just incrementing a variable and the code inside is more complex.

Interlocked

System.Threading.Interlocked is a faster alternative to the previous use of lock. It is good for incrementing and decrementing a counter and not for more complex locking situations.

int counter = 0;
        
public void ThreadMethod()
{
    Interlocked.Increment(ref counter);
}

This sample is doing the same thing as the lock sample, only now it is does not need the lock object. Here the Interlocked.Increment method takes a reference to the counter variable and increments it in a single, atomic CPU instruction. That means that the read, increment, and write are being done all at once and therefore multiple threads will not step on each other when trying to increment the counter variable. Since this is an atomic operation there is no possibility of a context switch during the increment.

I was curios as to how this was being done so I found the .Net code on github. All the related methods for incrementing boiled down to this:

internal static extern int ExchangeAdd(ref int location1, int value);

That is helpful isn’t it? I had never seen the extern keyword before and this ExchangeAdd method is just declared, with no body. After a little research I found a few things out. According to the C# specification 10.6.7 (word doc):

When a method declaration includes an extern modifier, that method is said to be an external method. External methods are implemented externally, typically using a language other than C#. Because an external method declaration provides no actual implementation, the method-body of an external method simply consists of a semicolon. An external method may not be generic. The extern modifier is typically used in conjunction with a DllImport attribute, allowing external methods to be implemented by DLLs (Dynamic Link Libraries). The execution environment may support other mechanisms whereby implementations of external methods can be provided. When an external method includes a DllImport attribute, the method declaration must also include a static modifier.

So the extern keyword simply means the method is written in unmanaged code and gets filled in by the compiler. This can allow for lower level code to be used, in this case it boils down to one cpu instruction.

Summary

Both methods help keep our counters with the correct value and allow many threads to read, increment, and write all at nearly the same instant. Lock works for this case, but in more complex scenarios where more code is need lock really shines. Using the Interlocked class is much faster and cleaner when doing simple increment and decrement operations on a counter variable.

Let me know your thoughts and experiences with multithread counters, in the comments or on twitter @ScottKerlagon!

Improve Your Code by Using the New C# 6 Features

The new versions, C# 6 and Visual Studio 2015 come with some pretty cool new features. Mads Torgersen and Dustin Campbell gave a presentation at //build/ 2015 covering a lot of them, which can be viewed at https://channel9.msdn.com/Events/Build/2015/3-711. I want to point out and give a few samples of the ones I found the most interesting and useful.

IDE Features

Many new features have been added in Visual Studio 2015. They are mostly subtle, but they each make life just a little bit easier.

Fade Unused Code

Now, for example, in your list of using statements at the top of each file the unused ones become faded to tell you that your code is not actually using anything from those namespaces. As you can see below the only using statement being referenced is the System namespace. All the rest are not used in this particular coding file and are faded out.

Faded Usings Feature

Quick Actions

As you might have noticed there is also a new little light bulb to the left of the code. This little guy means there are suggestions to make your code better. Clicking on it shows you something like the screenshot below. It is showing you that it can remove unused using statements and is indicated in the red highlighted area. These new suggestions are designed to keep you in the coding context without a jarring dialog that takes over your focus.

Visual Studio Light bulb Feature

Refactoring

Another cool enhancement is the rename functionality. As you type a new name the rename functionality keeps you in the code editor and shows you the changes live as you type.

Visual Studio Rename Feature

Naming conflicts are auto-resolved, if possible, by adding things like the this keyword in-front of the conflict.
If you create an inline temporary variable and then use it, lets say in the next line, Visual Studio can easily get rid of that variable and combine the two lines. This helps make your code shorter, easier to read and maintain.

C# 6 Language Features

There are also many cool little additions to the language that make code more readable and faster to create due to it’s compactness and brevity.

Import using static

By adding in the using declarations at the top of your code file, where your using statements are, you can add something like “using static System.Console;” This will allow you to write the below code.

Static Using Statement Feature

Here you can see that instead of prefixing your method call with the static class name, you can simply call the static method. Personally I am not sure if this makes the code more readable or not. The static keyword Console, in this case is telling you more about where that line is being written. However using it on something like Math.Abs(5.5) -> Abs(5.5) I would say is more readable and clearer. This ability can be used with Enums as well. I would advise caution when using this new feature and only use it when it actually makes the code more clear and not more confusing. I believe this will depend on how telling names of the class and method are.

Method Declarations

Often we have simple method declarations that are one line and need {‘s and return keywords, in other words, lots of boilerplate code. Now we can get rid of that boilerplate and rewrite the old code in one line using lambda style notation like below.

New Method Declaration Feature

Interpolated Strings and nameof()

This is my favorite new feature. It makes writing log messages and things like throwing exceptions on guard clauses so much easier. Interpolated Strings remove the old string.Format() and replace it with $”” and the place holders like {0} are replaced with {variable} and are not needed as the last parameters any more.

Interpolated Strings Feature

Here I combined the use of the new nameof() method to get the name of the property instead of using a hard coded string in the old way example. This becomes really useful when throwing ArgumentNullExceptions and you want to reference the parameter name. The old way would be a string and not get updated if the parameter name was refactored, now it is updated automatically.

Null Conditional

Perhaps the single most useful new feature is the Null Conditional. This helps remove all the null checking spaghetti code. The “Elvis” operator, “?.”, can now be leveraged to check nulls inline and check properties as you reference them.

Null Conditional Feature

As you see above, If I wanted to get the 3rd record from a list of people, I would have to check that the list is not null, that the list has an element at 3 and that the third element is not null. Instead of doing a bunch of comparisons count checking it can be simplified using the Elvis operator as show above. The way this new operator works is by returning the value if not null and a null value if any in the chain are null.

Conclusion

Using all these new features will help strip out and compact code. It helps eliminate boilerplate code, increase readability, maintainability, and contribute to the all around cleanness of the code. As I think Mads sums it up the best:

“Room for more logic on your screen.” -Mads

A full list of the features Mads covers in the talk can be found here http://blogs.msdn.com/b/csharpfaq/archive/2014/11/20/new-features-in-c-6.aspx (note the notes at the end of his post for changes). An interesting list of proposed changes for C# 7 (future) can be found on GitHub https://github.com/dotnet/roslyn/issues/2136 and is worth a glance.

Let me know in the comments or on twitter @ScottKerlagon how you think these new features will help improve your code!

Tagged

Item Templates, Saving You Time in Visual Studio

Item Templates

As software developers who spend a large majority of our time in front of our IDE, it makes sense to optimize it’s settings to meet our specif needs. Changing just a few small things can have dramatic time savings over the long run if we are constantly having to do them over and over again. I am going to primarily focus on Visual Studio item templates. Every time you hit shift+alt+c to add a new class file or right click on a project and choose “Add->New Item…” this gives you the ability to select a pre-canned/starter file. These files contain the same boring and repetitive skeleton code to get that type of item started. Imagine having to type out all your usings, namespace, and class declarations every time you need to create a new class. Item templates are a great productivity booster!

Ya, And?

So you are probably saying to yourself, so what, every one knows about these and have been using them forever. What if you don’t like the pre-canned ones? What if you love them and wish they were just slightly different? What if you wanted your own custom, perhaps multi-file item templates? I am sure many of you have downloaded other item templates that come with extensions or even as standalone templates from the Visual Studio Gallery. Today I am going to show you how you can modify existing item templates or create your own.

If Only It Had…

If I had to guess, I would venture to say that, the most common item template for a C# developer is the Class item template. One way we can possibly improve on this template is to make the class public. I am almost always having to do this manually, and it bothers me. You could also make it default to internal if you feel safer that way.

OK, lets enhance the default one. The default class item template is installed at “C:\Program Files (x86)\Microsoft Visual Studio 12.0\Common7\IDE\ItemTemplates\CSharp\Code\1033\Class”, the location should only vary based on the Visual Studio version you are using, I currently am using 2013. Inside of this folder are two files Class.cs and Class.vstemplate. The .cs file is a template filled with parameters that Visual Studio will replace when you choose it through adding a new item. This is the main file we care about, here we can add the public key word in front of class. Lets say we want a default public constructor as well. Lets also remove the use of System.Threading.Tasks using statement, since 90% of the time I don’t need that. Now we end up with a file that looks like this:

using System;
using System.Collections.Generic;
$if$ ($targetframeworkversion$ >= 3.5)using System.Linq;
$endif$using System.Text;
 
namespace $rootnamespace$
{
    public class $safeitemrootname$
    {
        public $safeitemrootname$()
        {
        }
    }
}

(To edit this file you need admin rights, also if you try and use it after editing, it may not take your changes right away, as VS does some caching of these files. Some of the times I had to copy the .cs file into “C:\Program Files (x86)\Microsoft Visual Studio 12.0\Common7\IDE\ItemTemplatesCache\CSharp\Code\1033\Class” to see it immediately, I am not sure when VS updates this cache location on its own.)

Now when we add a new class, we get the following:

using System;
using System.Collections.Generic;
using System.Linq;
using System.Text;
 
namespace ClassLibrary1
{
    public class MyNewClass
    {
        public MyNewClass()
        {
 
        }
    }
}

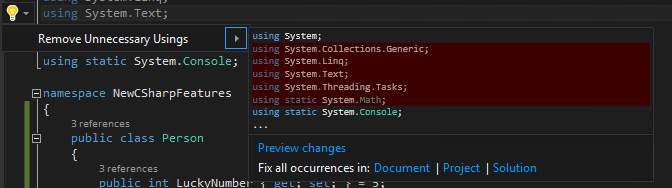
In the template file, you will notice all the $parameter$’s that are filled in by VS when adding a new item. A list of all the ones available can be found at https://msdn.microsoft.com/en-us/library/eehb4faa.aspx. You can do all kinds of fun things with these. Some companies I have worked for have headers at the top of all their files. These headers have things like copy write information, the date and time that the file was created, and the user who created the file. All this stuff can be pre-populated using some of the available parameters.

 You Promised Multiple Files!

So far I have shown you how the template files can be created and how to edit existing ones. What if you love the current ones and want to create your own additional ones? Now I know there are even cooler things that can be done with scaffolding, that are much more complex, but I am not going to get into those here.

I often find myself creating an entity then a repository for that entity along with an interface for the repository. My entity always has things like an Id that I can include in a custom item template. My repository is always named EntityNameRepository and implements IEntityNameRepository. Some times I also need an angular service and MVC controller for that entity as well. These types of scenarios are a perfect use cases for item templates. Since I already demonstrated how to work on the template file, here I will show you how to create a new item template package with multiple files.

To start, open up any type of new project in visual studio or existing one, I used a class library. Fill out all the template files you will want, in my case I created two files one called Class.cs and the other Repository.cs, don’t worry their names will be overridden later on. After you have your skeleton code and $parameters$ in place you are ready to export. In Visual Studio clicking File -> Export Template will bring up the Export Template Wizard.

Select Item Template

Select “Item template” and from which project you want to export from. Clicking “Next” will take you to a page in which you can select the file you want as a template, unfortunately you can only pick one from this dialog, don’t worry we just have to manually add the others. After selecting a file and clicking next you will be able to select what assemblies you want included when adding the template, for our case none. The following screen is a result of clicking “Next” and allows you to fill in info that will be displayed on the add new item dialog.

Export Options for your Item Template

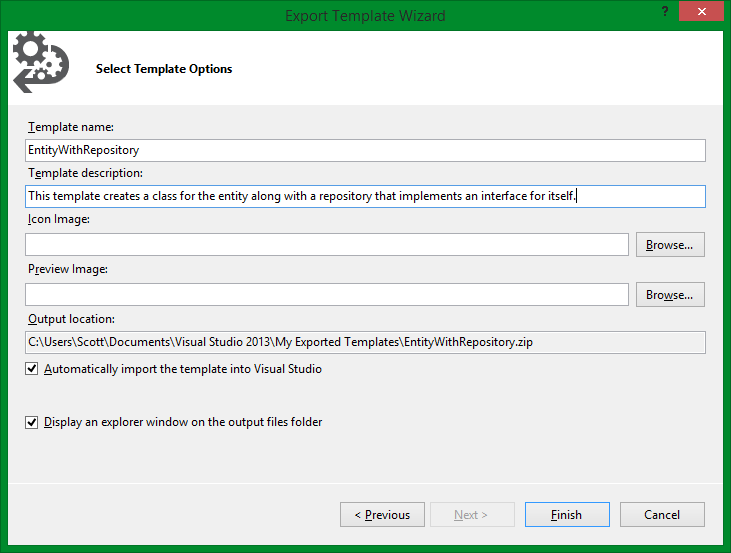
As you can see there are several options like including an icon, output directory and if you want it imported automatically. We are going to have to manually edit a few things and re-import anyway. The output of this the export is a .zip file that contains all the files needed. Unzip this folder and add any template files that are missing. Next edit the MyTemplate.vstemplate file to include the missing files that you just copied into this folder. Use the existing ProjectItem node as a reference and change the file names accordingly.

<VSTemplate Version="3.0.0" xmlns="http://schemas.microsoft.com/developer/vstemplate/2005" Type="Item">
  <TemplateData>
    <DefaultName>EntityWithRepository.cs</DefaultName>
    <Name>EntityWithRepository</Name>
    <Description>This template creates a class for the entity along with a repository that implements an interface for itself.</Description>
    <ProjectType>CSharp</ProjectType>
    <SortOrder>10</SortOrder>
    <Icon>__TemplateIcon.ico</Icon>
  </TemplateData>
  <TemplateContent>
    <References />
    <ProjectItem SubType="Code" TargetFileName="$fileinputname$Repository.cs" ReplaceParameters="true">Repository.cs</ProjectItem>
    <ProjectItem SubType="Code" TargetFileName="$fileinputname$.cs" ReplaceParameters="true">Class.cs</ProjectItem>
  </TemplateContent>
</VSTemplate>

You can see that the new file names will be the one input on the add new item dialog and the Repository word will be appended for the repository file. Next just zip up the new contents. (A word of caution, clicking on the parent folder and using “Send To->Compressed Folder” adds an extra folder in between which will not work. I selected all the files and then zipped those up instead.) Now all you need to do is replace the originally created .zip file with the new one at “C:\Users\<Your User Name>\Documents\Visual Studio 2013\Templates\ItemTemplates”, this is where Visual Studio will look for custom item templates. Now you should be able to use your new item template. (Visual Studio may need to be restarted to show up.)

Use the new Item Template from the Add New Item dialog

Using the new item template will yield two shinny new files using the name you specified!

But Wait, There’s More

There are also Project Templates that you can create that will give you tons of different files, make sure you have all the right references and even create multiple projects. So for example if you always create an MVC project, import your favorite assemblies, use a certain folder structure, have an additional model, data access, or test projects, you can!

So now you are thinking, this all sounds great, but that sounds like a ton of work, isn’t there some pre-made stuff? The answer of course is yes! John Papa and others maintain an open project called SideWaffle which contains all kinds of  commonly used project and item templates that can either work for you or start as a basis for your own modifications.

Let me know in the comments or on twitter @ScottKerlagon about templates you use to save time or ideas on new templates!

Logging, Better to Have It, Before You Need It

Motivation for Logging

Logging is the one thing you don’t know you need until you need it. I’m sure many of us have all been in the situation in which you wish you knew what your program was doing in a production environment. If only you could set a break point to check all of your variables and figure out why you can’t recreate it on your machine. One of the best solutions to this situation is logging! Good logging can often help you know exactly why that exception occurred. You can write logs as granular as you need. You can even set logging up so that different levels are logged based on a setting, either from a web.config file or a database. Some the reasons I can think of off the top of my head are:

  • Debugging purposes
  • Auditing user access
  • Performance metrics
  • Usability assessment
  • Supplement to commenting your code

I stumbled across another blog by Erik Hazzard in which he goes into more detail about why logging is important. vasir.net/blog/development/how-logging-made-me-a-better-developer

Today I am going to show you my simple logging and audit solution. I know there are many enterprise level logging solutions out there, such as Log4Net, but those are over kill for my needs and writing this takes just as much time as integrating a third party framework. I am using Entity Framework with my ASP.NET MVC project. I am also using Unity for dependency injection, in case the usage below is unclear. I wanted an easy way to be able to write log entries and automatically collect information on my controllers and their actions with the minimum amount of effort. My project has three main layers. The model layer, where I keep all my entities and class that describe my domain. The data layer keeps all my repositories and contexts for actually writing and saving data, it does a nice job of decoupling my data access from the rest of my code. My last main layer is the actual MVC project that contains all of my controllers, HTML and JavaScript.

Model/Entity

Here I have a simple log entry object, which has the properties that I am most interested in logging.

public class LogEntry
{
    public int Id { getset; }
    public string UserName { getset; }
    public string Message { getset; }
    public string Controller { getset; }
    public string Action { getset; }
    public string IP { getset; }
    public DateTime DateTime { getset; }
    public LogType LogType { getset; }
}
 
public enum LogType
{
    ControllerAction,
    UserEvent,
    EntityFrameWork,
    Exception
}

Here you can see I want to track things like the user who is logged in, the name of the current controller and action, the date and time, a message, and what type of log event this is. Nice and simple! It will be easy to add more properties in the future if I have a need for extra information.

Data Layer

Here is my simple context which Entity Framework’s code first will use when creating the LogEntries table. The LogEntryConfiguration simply sets the Id as required, so I am not going show that here.

public class LoggingContext : DbContext
{
    public LoggingContext()
        : base("DefaultConnection")
    {
    }
 
    public DbSet<LogEntry> LogEntries { getset; }
 
    protected override void OnModelCreating(DbModelBuilder modelBuilder)
    {
        modelBuilder.Configurations.Add(new LogEntryConfiguration());
    }
}

In my data layer I have a repository for logging that allows me to do CRUD like operations. The interface allows me to decouple the consuming code from the actual implementation of the logging. This will make changing to some other logging mechanism, such as writing to a text file or another database, a piece of cake, as none of the calling code will have to change.

public interface ILogEntryRepository
{
    IEnumerable<LogEntry> GetAllLogEntries();
    IEnumerable<LogEntry> GetAllLogEntriesForLogType(LogType logType);
    IEnumerable<LogEntry> GetAllLogEntriesForLogTypeInDateRange(LogType logType, DateTime startDate, DateTime endDate);
    IEnumerable<LogEntry> GetAllLogEntriesInTimeRange(DateTime startDate, DateTime endDate);
    LogEntry InsertLogEntry(LogEntry logEntry);
    void LogMessage(string message);
}

Below is the interface I defined that my log entry repository implements. I have several methods for viewing and filtering log entries that I use on a dashboard. The main method, which we are concerned about here, is the InsertLogEntry method. This method simply takes a LogEntry and saves it to the database. I am injecting the LoggingContext in through my constructor and am using that instance in all my methods for database communication. As you can see the code is simple and straight forward.

public class LogEntryRepository : ILogEntryRepository
{
    private LoggingContext context;
    public LogEntryRepository(LoggingContext context)
    {
        this.context = context;
    }
 
    public IEnumerable<LogEntry> GetAllLogEntries()
    {
        return context.LogEntries.OrderByDescending(x => x.DateTime).ToList();
    }
 
    public IEnumerable<LogEntry> GetAllLogEntriesForLogType(LogType logType)
    {
        return context.LogEntries.Where(x => x.LogType == logType).OrderByDescending(x => x.DateTime).ToList();
    }
 
    public LogEntry InsertLogEntry(LogEntry logEntry)
    {
        logEntry = context.LogEntries.Add(logEntry);
        context.SaveChanges();
        return logEntry;
    }
 
    public void LogMessage(string message)
    {
        LogEntry logEntry = new LogEntry()
        {
            Message = message,
            DateTime = DateTime.Now,
            LogType = LogType.EntityFrameWork
        };
        context.LogEntries.Add(logEntry);
        context.SaveChanges();
    }
 
    public IEnumerable<LogEntry> GetAllLogEntriesForLogTypeInDateRange(LogType logType, DateTime startDate, DateTime endDate)
    {
         return context.LogEntries.Where(x => x.LogType == logType && x.DateTime.Date <= endDate.Date && x.DateTime.Date >= startDate).OrderByDescending(x => x.DateTime).ToList();
    }
 
    public IEnumerable<LogEntry> GetAllLogEntriesInTimeRange(DateTime startDate, DateTime endDate)
    {
        return context.LogEntries.Where(x => x.DateTime.Date <= endDate.Date && x.DateTime.Date >= startDate).OrderByDescending(x => x.DateTime).ToList();
    }
}

MVC Project/Consumer

One place where I consume my logging repository, is in a custom ActionFilter. This ActionFilter automatically logs any time a controller’s action is entered. This filter just populates a LogEntry object in the OnActionExecuting method, which fires when a method on a controller is hit. My filter is making use of Setter Injection using the [Dependency] attribute that comes with Unity, my IoC container, to set my LogEntryRepository. After creating a LogEntry object all I need to do is call my repository and insert the log entry.

public class LogFilter : ActionFilterAttributeIActionFilter
{
     [Dependency]
     public ILogEntryRepository LogEntryRepo { getset; }
 
     void IActionFilter.OnActionExecuting(ActionExecutingContext filterContext)
     {
         LogEntry log = new LogEntry()
         {
             UserName = filterContext.HttpContext.User.Identity.Name,
             Controller = filterContext.ActionDescriptor.ControllerDescriptor.ControllerName,
             Action = filterContext.ActionDescriptor.ActionName,
             IP = filterContext.HttpContext.Request.UserHostAddress,
             DateTime = DateTime.Now,
             LogType = LogType.ControllerAction
         };
 
         LogEntryRepo.InsertLogEntry(log);
 
         this.OnActionExecuting(filterContext);
     }
}

All I have to do is decorate a controller/action method with this LogFilter attribute and presto, detailed information is logged to the database. What could be less painful?

[LogFilter]
public class ItemController : Controller
{

The Output

Here is an image of my SQL database after running through my application. Near the bottom, you can see two log messages that are the result of exceptions being triggered. The entry contains the exception message and the LogType is set to 3, based on my enumerations. All of the IP’s are shown as ::1 because I was running locally.

Database Logging

I hope you found this solution helpful and/or inspiring to help you create or expand on your own logging implementation. I would like to know about the logging solutions you are currently using and when it has come in handy the most. Let me know in the comments or on Twitter @ScottKerlagon!

Also let me know if you would like me to cover some of the concepts I used such as dependency injection and the repository pattern in future posts.